Rapberry Pi に OpenCV
- 11月
- 29
Rapberry Pi に関するサイトを読みあさっていると OpenCV で顔認識ができるできるって話を見つけた。
『はんだ日和』さんとこの「Raspberry Pi にOpenCV をインストール」では apt-get だけではなく、最新版をビルドしてインストールする手順を紹介している。
“俺も、最新版いれよ~”とダウンロードして展開までした。
“でもちょっと待てよ…マシンの個体差なんてないはずだから誰かビルド済みを公開してない?”と思い「opencv raspberry pi download」でググる!
一番上に「OpenCV 2.4.9 compiled libraries for Raspberry Pi (RPi)」がでてくる!
https://github.com/Nolaan/libopencv_24で公開してるらしい…現時点の最新版が 2.4.10 だけどバージョン毎にディレクトリ切られてるかなと思いつつダウンロード先を見に行くと、2.4.9 はなく 2.4.10 が置かれている。ナイスだ Nolaan !
ダウンロードしたら
[code]
pi@raspberrypi ~ $ unzip libopencv_24-master.zip
[/code]
して
[code]
sudo cp -P libopencv_* /usr/local/lib
[/code]
して
[code]
/etc/ld.so.conf.d/opencv.conf
[/code]
ってファイル作って中に
[code]
/usr/local/lib
[/code]
って書いたら
[code]
sudo ldconfig
[/code]
しておしまい。
って、ビルドをしなくて済むだけで本体は別に落とさないと sample とかついてないのか。
落として解凍しなきゃ。
Rapberry Pi に OpenCV はコメントを受け付けていませんRaspberry Pi
Raspberry Pi camera で遊び中
- 11月
- 17
Raspberry Pi に繋いだだけじゃあれなので、camera でちょっと遊んでます。
ここ 見ると既知の問題として
- ISOは「night」や「sports」モードで 1600 にすることができるけど、-ISO オプションを使っての 直接指定では 100~800 しか設定できないよ。
- 1秒より長い露出時間はサポートされていません。
とかある。
暗いところでどれくらい使えるか確認してみる。
まず、ISO800 だけ指定して Auto モードで撮影。

次に上述の情報の確認のため露出時間 10 秒にして ISO100 Autoモードで撮影。

露出時間10秒で撮れるじゃん!と思って EXIF 情報確認すると 5.97秒…10秒は無理だけど1秒以上で撮れるじゃん!
ISO800 で5秒露出 Autoモードで撮影。

さらに明るくなった!実際には5秒露出とかって完全に止まってる物しか撮れませんが。
night モードのみの指定では…

ISO400 で0.98秒で緑….
ISO指定しても最高800まででした。
他に面白いパラメータはといろいろ試してみる。
DRC を high に設定して 5秒露出の iso400 で撮影すると

まぁ、なんて明るいんでしょう。もちろん上と同じ環境で撮ってます。
90 FPS で動画撮影すると、スローで再生できるのも面白い。
Raspberry Pi camera で遊び中 はコメントを受け付けていませんRaspberry Pi
Raspberry Pi のカメラが届いた。
- 11月
- 8
Raspberry Pi にはカメラ専用のインターフェースが用意されていて、専用のカメラも売られている…
調べたら、eBay で China Version だけど深圳からの送料込み 1,800円程度で購入できることがわかった。
ちなみに日本で普通に買うと 3,700円くらい。
この金額で、5メガピクセルで、2,592×1,944ピクセルの画像と、1080p、H264形式で、1秒間に30フレームの動画を記録できるんだからまぁ買いでしょ。
で10月30日に注文した。11月 8日のきょう、それが届いた。
『Raspberry Piカメラのセットアップ方法』を参考にセットアップ。
[code]
pi@raspberrypi ~ $ sudo apt-get update
pi@raspberrypi ~ $ sudo apt-get upgrade
[/code]
とした後
[code]
pi@raspberrypi ~ $ sudo raspi-config
[/code]
で camera を Enable にする。終了すると再起動が行われるけど、もうこれで写真が撮れる。
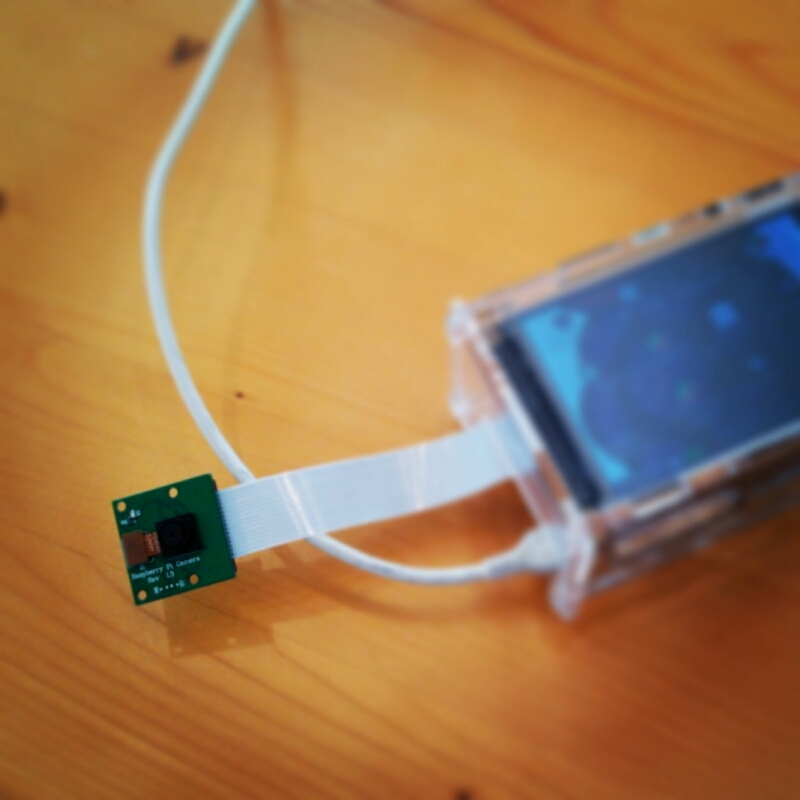
[code]
pi@raspberrypi ~ $ raspistill -o image.jpg
[/code]
H264フォーマットで5秒間の動画なら
[code]
pi@raspberrypi ~ $ raspivid -o video.h264
[/code]
なんて簡単なんでしょう。
それぞれのコマンドのオプションは以下。随分多機能みたいです。
[code]
pi@raspberrypi ~ $ raspistill
raspistill Camera App v1.3.8
Runs camera for specific time, and take JPG capture at end if requested
usage: raspistill [options]
Image parameter commands
-?, –help : This help information
-w, –width : Set image width <size>
-h, –height : Set image height <size>
-q, –quality : Set jpeg quality <0 to 100>
-r, –raw : Add raw bayer data to jpeg metadata
-o, –output : Output filename <filename> (to write to stdout, use ‘-o -‘). If not specified, no file is saved
-l, –latest : Link latest complete image to filename <filename>
-v, –verbose : Output verbose information during run
-t, –timeout : Time (in ms) before takes picture and shuts down (if not specified, set to 5s)
-th, –thumb : Set thumbnail parameters (x:y:quality) or none
-d, –demo : Run a demo mode (cycle through range of camera options, no capture)
-e, –encoding : Encoding to use for output file (jpg, bmp, gif, png)
-x, –exif : EXIF tag to apply to captures (format as ‘key=value’) or none
-tl, –timelapse : Timelapse mode. Takes a picture every <t>ms
-fp, –fullpreview : Run the preview using the still capture resolution (may reduce preview fps)
-k, –keypress : Wait between captures for a ENTER, X then ENTER to exit
-s, –signal : Wait between captures for a SIGUSR1 from another process
-g, –gl : Draw preview to texture instead of using video render component
-gc, –glcapture : Capture the GL frame-buffer instead of the camera image
-set, –settings : Retrieve camera settings and write to stdout
-cs, –camselect : Select camera <number>. Default 0
Preview parameter commands
-p, –preview : Preview window settings <’x,y,w,h’>
-f, –fullscreen : Fullscreen preview mode
-op, –opacity : Preview window opacity (0-255)
-n, –nopreview : Do not display a preview window
Image parameter commands
-sh, –sharpness : Set image sharpness (-100 to 100)
-co, –contrast : Set image contrast (-100 to 100)
-br, –brightness : Set image brightness (0 to 100)
-sa, –saturation : Set image saturation (-100 to 100)
-ISO, –ISO : Set capture ISO
-vs, –vstab : Turn on video stabilisation
-ev, –ev : Set EV compensation
-ex, –exposure : Set exposure mode (see Notes)
-awb, –awb : Set AWB mode (see Notes)
-ifx, –imxfx : Set image effect (see Notes)
-cfx, –colfx : Set colour effect (U:V)
-mm, –metering : Set metering mode (see Notes)
-rot, –rotation : Set image rotation (0-359)
-hf, –hflip : Set horizontal flip
-vf, –vflip : Set vertical flip
-roi, –roi : Set region of interest (x,y,w,d as normalised coordinates [0.0-1.0])
-ss, –shutter : Set shutter speed in microseconds
-awbg, –awbgains : Set AWB gains – AWB mode must be off
-drc, –drc : Set DRC Level
Notes
Exposure mode options :
auto,night,nightpreview,backlight,spotlight,sports,snow,beach,verylong,fixedfps,antishake,fireworks
AWB mode options :
off,auto,sun,cloud,shade,tungsten,fluorescent,incandescent,flash,horizon
Image Effect mode options :
none,negative,solarise,sketch,denoise,emboss,oilpaint,hatch,gpen,pastel,watercolour,film,blur,saturation,colourswap,washedout,posterise,colourpoint,colourbalance,cartoon
Metering Mode options :
average,spot,backlit,matrix
Dynamic Range Compression (DRC) options :
off,low,med,high
Preview parameter commands
-gs, –glscene : GL scene square,teapot,mirror,yuv,sobel
-gw, –glwin : GL window settings <’x,y,w,h’>
[/code]
[code]
pi@raspberrypi ~ $ raspivid
raspivid Camera App v1.3.12
Display camera output to display, and optionally saves an H264 capture at requested bitrate
usage: raspivid [options]
Image parameter commands
-?, –help : This help information
-w, –width : Set image width <size>. Default 1920
-h, –height : Set image height <size>. Default 1080
-b, –bitrate : Set bitrate. Use bits per second (e.g. 10MBits/s would be -b 10000000)
-o, –output : Output filename <filename> (to write to stdout, use ‘-o -‘)
-v, –verbose : Output verbose information during run
-t, –timeout : Time (in ms) to capture for. If not specified, set to 5s. Zero to disable
-d, –demo : Run a demo mode (cycle through range of camera options, no capture)
-fps, –framerate : Specify the frames per second to record
-e, –penc : Display preview image *after* encoding (shows compression artifacts)
-g, –intra : Specify the intra refresh period (key frame rate/GoP size)
-pf, –profile : Specify H264 profile to use for encoding
-td, –timed : Cycle between capture and pause. -cycle on,off where on is record time and off is pause time in ms
-s, –signal : Cycle between capture and pause on Signal
-k, –keypress : Cycle between capture and pause on ENTER
-i, –initial : Initial state. Use ‘record’ or ‘pause’. Default ‘record’
-qp, –qp : Quantisation parameter. Use approximately 10-40. Default 0 (off)
-ih, –inline : Insert inline headers (SPS, PPS) to stream
-sg, –segment : Segment output file in to multiple files at specified interval <ms>
-wr, –wrap : In segment mode, wrap any numbered filename back to 1 when reach number
-sn, –start : In segment mode, start with specified segment number
-sp, –split : In wait mode, create new output file for each start event
-c, –circular : Run encoded data through circular buffer until triggered then save
-x, –vectors : Output filename <filename> for inline motion vectors
-cs, –camselect : Select camera <number>. Default 0
H264 Profile options :
baseline,main,high
Preview parameter commands
-p, –preview : Preview window settings <’x,y,w,h’>
-f, –fullscreen : Fullscreen preview mode
-op, –opacity : Preview window opacity (0-255)
-n, –nopreview : Do not display a preview window
Image parameter commands
-sh, –sharpness : Set image sharpness (-100 to 100)
-co, –contrast : Set image contrast (-100 to 100)
-br, –brightness : Set image brightness (0 to 100)
-sa, –saturation : Set image saturation (-100 to 100)
-ISO, –ISO : Set capture ISO
-vs, –vstab : Turn on video stabilisation
-ev, –ev : Set EV compensation
-ex, –exposure : Set exposure mode (see Notes)
-awb, –awb : Set AWB mode (see Notes)
-ifx, –imxfx : Set image effect (see Notes)
-cfx, –colfx : Set colour effect (U:V)
-mm, –metering : Set metering mode (see Notes)
-rot, –rotation : Set image rotation (0-359)
-hf, –hflip : Set horizontal flip
-vf, –vflip : Set vertical flip
-roi, –roi : Set region of interest (x,y,w,d as normalised coordinates [0.0-1.0])
-ss, –shutter : Set shutter speed in microseconds
-awbg, –awbgains : Set AWB gains – AWB mode must be off
-drc, –drc : Set DRC Level
Notes
Exposure mode options :
auto,night,nightpreview,backlight,spotlight,sports,snow,beach,verylong,fixedfps,antishake,fireworks
AWB mode options :
off,auto,sun,cloud,shade,tungsten,fluorescent,incandescent,flash,horizon
Image Effect mode options :
none,negative,solarise,sketch,denoise,emboss,oilpaint,hatch,gpen,pastel,watercolour,film,blur,saturation,colourswap,washedout,posterise,colourpoint,colourbalance,cartoon
Metering Mode options :
average,spot,backlit,matrix
Dynamic Range Compression (DRC) options :
off,low,med,high
[/code]
Raspberry Pi のカメラが届いた。 はコメントを受け付けていませんRaspberry Pi, お買い物
V100リアタイヤ交換
- 11月
- 3
走行距離 31,808 km でリアタイヤを交換しました。交換したタイヤは
DUNLOP RUNSCOOT D307 3.50-10 2,993円
それと一緒に、こんな時しかできないしで エアーバルブも一緒に交換
L型 エアーバルブ 270円
今回のタイヤ交換、ビードあげに少し苦労しました。
前回はホイールにはめた後、上から体重を掛けて押してあげるだけで広がってあがりましたが今回はあがりません。
爆裂…に挑戦したけど片側は一発であがったけどもう一方は何度かトライしたけどだめ。
ネットで他の方法調べたらラチェットベルト使う方法があったので買ってきて強めに巻いて….簡単にあがりました。
爆裂はやっぱり危険だし、次回からビードワックスをホイールにも塗ってのラチェットベルトだな。
ラチェットベルト使ったビード上げについてはこの動画を見て下さい。
V100リアタイヤ交換 はコメントを受け付けていませんV100, バイク, 工作・修理
Raspberry Pi に lftp のインストール
- 11月
- 2
lftp はローカル・ディレクトリをサーバーにアップロードしたり、サーバーのディレクトリをローカルにダウンロードできる FTP クライアント。
lftp 用のコマンドファイルを書いておいて定期的に実行すると、定期的にファイルの同期を行うことができるようになる。
これもインストールしとく。といってもこれだけ。
[code]
pi@raspberrypi ~ $ sudo apt-get -y install lftp
[/code]
Raspberry Pi に lftp のインストール はコメントを受け付けていませんRaspberry Pi
Raspberry Pi に SAMBA のインストール
- 10月
- 31
Raspberry Pi のカメラ付けたくて値段調べたら、China Version だけど eBay で 送料込みで 1,800円程度と 一番安かったので買うことにした。
届くまで少々時間もかかるし、撮った写真をすぐに PC に取り込めるよう SAMBA をインストールすることにした。
と、その前に chkconfig をインストールしておくか。
[code]
pi@raspberrypi ~ $ sudo apt-get -y install chkconfig
[/code]
で、本題の SAMBA のインストール。
[code]
pi@raspberrypi ~ $ sudo apt-get -y install samba
[/code]
上でインストールした chkconfig を使って samba のランレベルの確認
[code]
pi@raspberrypi ~ $ chkconfig –list samba
samba 0:off 1:off 2:on 3:on 4:on 5:on 6:off
[/code]
Windows のネットワークコンピュータで確認すると “RASPBERRYPI” ってコンピュータが増えてる。
今はこれだけでいいかな。
2014/11/08 追記
Raspberry Pi に camera module がついたので共有の設定を追加する。
共有フォルダを作成し、
[code]
pi@raspberrypi ~ $ mkdir /home/pi/share
[/code]
/etc/samba/smb.conf の末尾に設定を追加
[code]
pi@raspberrypi ~ $ sudo vi /etc/samba/smb.conf
[share]
path=/home/pi/share
read only=no1
browsable=yes
guest ok = yes
force user = pi
[/code]
そしてサービスを再起動する。
[code]
$ sudo service samba restart
[/code]
Raspberry Pi に SAMBA のインストール はコメントを受け付けていませんRaspberry Pi
Raspberry Pi に vim のインストール
- 10月
- 29
無線化の作業をしていて気づいた。
vi が vi だった。
何を言っているかわからないかもしれないが
「俺たち vim」
なのだ。
なので
[code]
sudo apt-get -y install vim
[/code]
で vim をインストール。
それだけ。
alias の設定はいらないみたい。勝手にリンクはるようなので。
Raspberry Pi に vim のインストール はコメントを受け付けていませんRaspberry Pi
Raspberry Pi 無線LAN化
- 10月
- 27
Raspberry Pi は小さいのでいろいろ線につながれていると美しくない。
電源は仕方ないにしても、LAN も無線化したい。
最近の無線LANドングルは小さいので Raspberry Pi にお似合いだし。
機種は情報のある BUFFALO の WLI-UC-GNM2 を選び Amazon で購入。
設定のためには ネットワークに接続されている必要があるけど、今回設定をするのはネットワークに接続する機器で…どうしよと思ってちょっと考えた自分が恥ずかしい。2枚差し状態で起動。
普通に有線LAN で ssh で接続…
では先人達の経験に学ぼう….
「raspberry pi wli uc gnm2」でとりあえずググって一番上の『Raspberry Piを無線LAN化』を参考にしてみる。
[code]
pi@raspberrypi ~ $ lsusb
Bus 001 Device 002: ID 0424:9512 Standard Microsystems Corp.
Bus 001 Device 001: ID 1d6b:0002 Linux Foundation 2.0 root hub
Bus 001 Device 003: ID 0424:ec00 Standard Microsystems Corp.
Bus 001 Device 004: ID 0411:01ee BUFFALO INC. (formerly MelCo., Inc.) WLI-UC-GNM2 Wireless LAN Adapter [Ralink RT3070]
Bus 001 Device 005: ID 0a12:0001 Cambridge Silicon Radio, Ltd Bluetooth Dongle (HCI mode)
[/code]
をっ、ちゃんとドングル正しく見つけてる。 ifconfig しても IP ついてないけど表示される。接続はまだだけど。まぁこれは想定内。
[code]
sudo iwlist wlan0 scan
[/code]
すると自宅のアクセスポイントが見つかる。
さて、普通なら AOSS で簡単接続なんだけどなぁ…
ちょっとググると X 立ち上げると簡単接続らしい…
『Raspberry Pi ネットワークの設定』参考に。
デスクトップにある『WiFi Config』をダブルクリック。
WPS タブに移動しておいてアクセスポイントのAOSSモードにして
X の [PBC – push button] を押す。
Status が “Waiting for Register” から “WPS AP detected” に変わってしばらく待つけど
に変わらない。
タブを Cureent Status に切り替えると、こっちにも Status が表示されていてそっちは“WPS-TIMEOUT”になっている。何が悪いんだ?
あっちこっち調べた先をつまんでいくうちに Cureent Status タブの Status が “Could not get status from wpa_supplicant” になってる。
う~む、弱った。
何をキーに検索していて見つけたかわからないけど、AOSS を使用せずにセットアップしている『How To – Setup Wireless Adapters』を参考にする。
/etc/network/interfaces に auto wlan0 の一文を追加して
[code]
auto lo
auto wlan0
iface lo inet loopback
iface eth0 inet dhcp
allow-hotplug wlan0
iface wlan0 inet manual
wpa-roam /etc/wpa_supplicant/wpa_supplicant.conf
iface default inet dhcp
[/code]
こんな感じに。
/etc/wpa_supplicant/wpa_supplicant.conf は
[code]
ctrl_interface=DIR=/var/run/wpa_supplicant GROUP=netdev
update_config=1
network={
ssid="………………………….."
psk="………………………………………………………."
proto=WPA
key_mgmt=WPA-PSK
pairwise=CCMP
group=CCMP
}
[/code]
こんな感じ。
ここにいくまで多少試行錯誤したけど、でも
[code]
sudo wpa_supplicant -c/etc/wpa_supplicant/wpa_supplicant.conf -iwlan0 -d
[/code]
を実行するとおかしいところを教えてくれる。
proto が不正だと
[code]
invalid proto ‘WPA-PSK’
[/code]
と教えてくれるし、見つけた AP と SSID が一致しない場合には見つけた AP を SSID と共に示しつつ
[code]
wlan0: 0: 10:60:2f:36:1d:6e ssid=’106F3F341E6D’ wpa_ie_len=26 rsn_ie_len=24 caps=0x11 level=-85 wps
wlan0: skip – SSID mismatch
[/code]
と教えてくれる。この場合はそこにSSIDが表示されているわけだからそれを設定すればいい。成功すれば
[code]
EAPOL authentication completed successfully
[/code]
と表示させる。
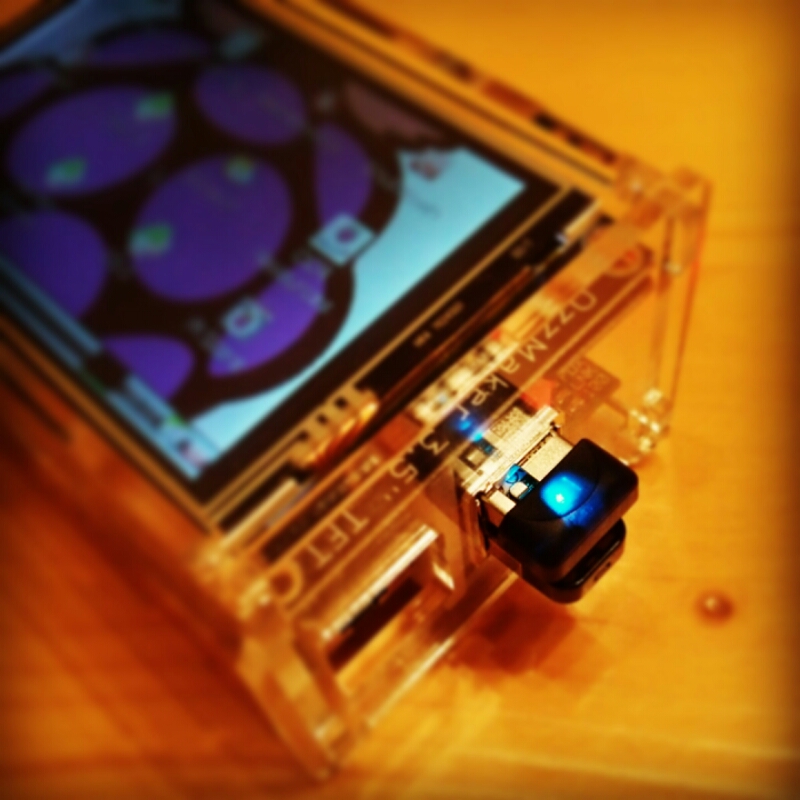
でも 無線アクセスポイントでIP確認すると AOSS で繋いでないことがわかる。
AOSS で繋ぎたいなぁ。
Raspberry Pi 無線LAN化 はコメントを受け付けていませんRaspberry Pi
Raspberry Pi で ハードウェア・アクセラレーション
- 10月
- 23
先日、 Raspberry Pi の OS イメージをダウンロードしようとダウンロード・サイトに行ったら Raspbian 以外にいろいろあった。
その中の RaspBMC があって、なんだろうと思って調べたら、この『RPi – Raspberry Pi + RaspBMC (XBMC) で世界中の映像コンテンツをテレビで楽しむ方法』を見つけた。
有償 だけど Raspberry Pi に統合されている ハードウェア・アクセラレーターが使えるらしい。
“えっ?ハードウェア・アクセラレーション?”とちょっとびっくり。
ってことでライセンス購入。
まず、CPU の シリアルを調べる。
[code]
pi@raspberrypi ~ $ cat /proc/cpuinfo
processor : 0
model name : ARMv6-compatible processor rev 7 (v6l)
Features : swp half thumb fastmult vfp edsp java tls
CPU implementer : 0x41
CPU architecture: 7
CPU variant : 0x0
CPU part : 0xb76
CPU revision : 7
Hardware : BCM2708
Revision : 000f
Serial : 00000000f1e2d3c4
[/code]
上記『RPiで楽しむ方法』に従い、Raspberry Pi Storeに行く。
目的はないけど、安いので、上で見つけた Serial に表示された値を入力して両方購入。
端数は VAT なのかな。住所を入力して表示された Cart では20% off で 3ポンドちょうど、日本円で 538円だった。
Your order number is: 101010
[code 1=”本当は Your order number is:180307″][/code]
しばらくすると
[code]
Thank you for purchasing codec license keys from the Raspberry Pi Store.To enable codecs on your device(s), add the following lines to the config.txt file in the FAT partition of your SD card:
decode_MPG2=0x40312213
decode_WVC1=0x1f2e3d4c
If you want to verify that the codecs are now enabled, the following commands will report their status:
vcgencmd codec_enabled MPG2
vcgencmd codec_enabled WVC1
Regards
The Raspberry Pi Foundation
[/code]
って内容のメールが届く。
[code 1=”本当は decode_MPG2=0x40401650″][/code]
[code 1=”本当は decode_WVC1=0x1f1ecaa7″][/code]
/boot/config.txt に以下を追加。
[code]
#License key to allow hardware MPEG-2 decoding.
decode_MPG2=0x40312213
#License key to allow hardware VC-1 decoding.
decode_WVC1=0x1f2e3d4c
[/code]
そして再起動。
Raspberry Pi 1台しか持ってないので試せませんが、SD を複数の Raspberry Pi で共有している場合用に上記 License key はカンマ区切りで最大8件指定することができるようです。
再起動してハードウエア・アクセラレーションが有効になっているか確認。
[code]
pi@raspberrypi ~ $ vcgencmd codec_enabled MPG2
MPG2=enabled
pi@raspberrypi ~ $ vcgencmd codec_enabled WVC1
WVC1=enabled
[/code]
よし、なってる。
あっ、“遅い”を体験することなく、いきなりハードウエア・アクセラレーションを有効にした関係で、“ハードウエア・アクセラレーションすげぇ”が経験できてないのが少々もったいない!(笑)
安価な Raspberry Pi で動画再生ができるなんて思っていませんでした。
Raspberry Pi で ハードウェア・アクセラレーション はコメントを受け付けていませんRaspberry Pi
PayPal アカウントアップグレード
- 10月
- 21
海外通販でたまにお世話になる PayPal に登録してあるメールアドレスをちょっと変更したいなと思ったら「メールアドレスの変更」で変更できない。
先人達の経験に学ぶとアカウントのアップグレードが必要とのこと。
アップグレードには免許証などをWebから送る必要があるらしい。
ちょっと変更したいだけなのでどうしようか迷ったけど、仕方ないので住所を漢字表記に直した後にアップグレード申請して、免許証をスキャナで読み込んで送った。
翌日メールが
「登録している氏名がローマ字表示だから漢字表記にして。」
ん~、住所は漢字表記に直したのに片手落ち。
氏名の変更なんてやっぱり簡単にさせてくれないので再度先人達の経験に学ぶ。
画面上部の「ヘルプ」をクリックして「カスタマーサービス」を表示、画面右側の「メールで問い合わせる」で問い合わせるらしい。
でもね、海外通販で使う PayPal なので漢字表記に変更する意味は本来どこにもない。アップグレードのためだけ。
この辺で意味ないことさせられている思いが強くなっていらいらする。
悪いことする人でも、免許証画像を送った時点でそこに書かれていた漢字表記を見ているし、またアカウントの表記を変更する意味もわからない。
でも仕方ないから変更依頼する。
しかも「本人確認済んだらすぐに戻すぞ!」って内容で。
そしたら翌日メール。
「暗証番号送ったよ。入力が済んだらローマ字表記への変更依頼してね。」
無駄なことさせられているようでやっぱりいらいらする。
PayPal アカウントアップグレード はコメントを受け付けていませんその他