Raspberry Pi のカメラが届いた。
- 11月
- 8
11:27 pm Raspberry Pi, お買い物
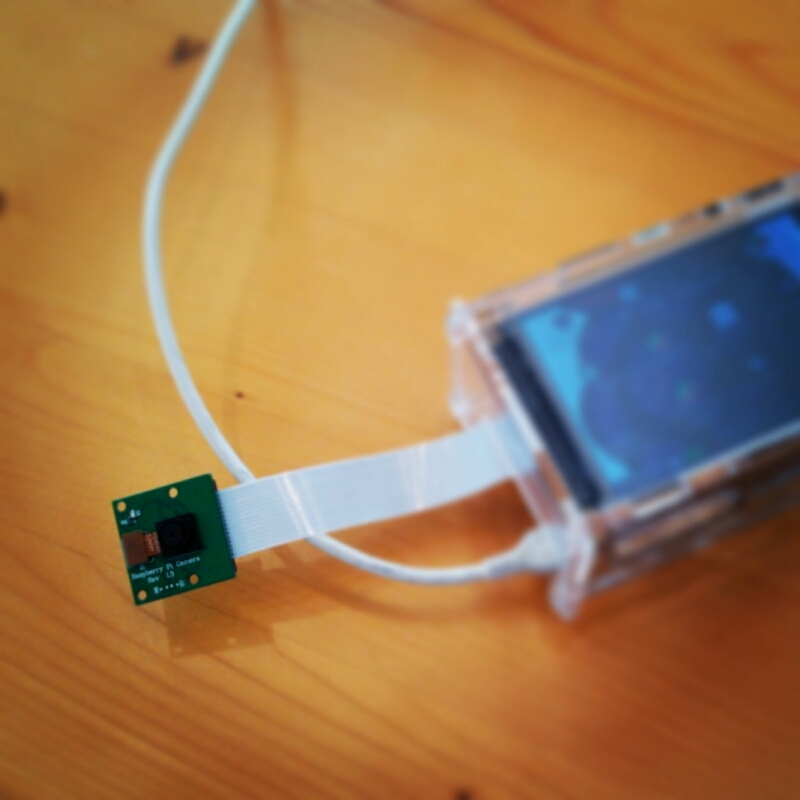
Raspberry Pi にはカメラ専用のインターフェースが用意されていて、専用のカメラも売られている…
調べたら、eBay で China Version だけど深圳からの送料込み 1,800円程度で購入できることがわかった。
ちなみに日本で普通に買うと 3,700円くらい。
この金額で、5メガピクセルで、2,592×1,944ピクセルの画像と、1080p、H264形式で、1秒間に30フレームの動画を記録できるんだからまぁ買いでしょ。
で10月30日に注文した。11月 8日のきょう、それが届いた。
『Raspberry Piカメラのセットアップ方法』を参考にセットアップ。
[code]
pi@raspberrypi ~ $ sudo apt-get update
pi@raspberrypi ~ $ sudo apt-get upgrade
[/code]
とした後
[code]
pi@raspberrypi ~ $ sudo raspi-config
[/code]
で camera を Enable にする。終了すると再起動が行われるけど、もうこれで写真が撮れる。
[code]
pi@raspberrypi ~ $ raspistill -o image.jpg
[/code]
H264フォーマットで5秒間の動画なら
[code]
pi@raspberrypi ~ $ raspivid -o video.h264
[/code]
なんて簡単なんでしょう。
それぞれのコマンドのオプションは以下。随分多機能みたいです。
[code]
pi@raspberrypi ~ $ raspistill
raspistill Camera App v1.3.8
Runs camera for specific time, and take JPG capture at end if requested
usage: raspistill [options]
Image parameter commands
-?, –help : This help information
-w, –width : Set image width <size>
-h, –height : Set image height <size>
-q, –quality : Set jpeg quality <0 to 100>
-r, –raw : Add raw bayer data to jpeg metadata
-o, –output : Output filename <filename> (to write to stdout, use ‘-o -‘). If not specified, no file is saved
-l, –latest : Link latest complete image to filename <filename>
-v, –verbose : Output verbose information during run
-t, –timeout : Time (in ms) before takes picture and shuts down (if not specified, set to 5s)
-th, –thumb : Set thumbnail parameters (x:y:quality) or none
-d, –demo : Run a demo mode (cycle through range of camera options, no capture)
-e, –encoding : Encoding to use for output file (jpg, bmp, gif, png)
-x, –exif : EXIF tag to apply to captures (format as ‘key=value’) or none
-tl, –timelapse : Timelapse mode. Takes a picture every <t>ms
-fp, –fullpreview : Run the preview using the still capture resolution (may reduce preview fps)
-k, –keypress : Wait between captures for a ENTER, X then ENTER to exit
-s, –signal : Wait between captures for a SIGUSR1 from another process
-g, –gl : Draw preview to texture instead of using video render component
-gc, –glcapture : Capture the GL frame-buffer instead of the camera image
-set, –settings : Retrieve camera settings and write to stdout
-cs, –camselect : Select camera <number>. Default 0
Preview parameter commands
-p, –preview : Preview window settings <’x,y,w,h’>
-f, –fullscreen : Fullscreen preview mode
-op, –opacity : Preview window opacity (0-255)
-n, –nopreview : Do not display a preview window
Image parameter commands
-sh, –sharpness : Set image sharpness (-100 to 100)
-co, –contrast : Set image contrast (-100 to 100)
-br, –brightness : Set image brightness (0 to 100)
-sa, –saturation : Set image saturation (-100 to 100)
-ISO, –ISO : Set capture ISO
-vs, –vstab : Turn on video stabilisation
-ev, –ev : Set EV compensation
-ex, –exposure : Set exposure mode (see Notes)
-awb, –awb : Set AWB mode (see Notes)
-ifx, –imxfx : Set image effect (see Notes)
-cfx, –colfx : Set colour effect (U:V)
-mm, –metering : Set metering mode (see Notes)
-rot, –rotation : Set image rotation (0-359)
-hf, –hflip : Set horizontal flip
-vf, –vflip : Set vertical flip
-roi, –roi : Set region of interest (x,y,w,d as normalised coordinates [0.0-1.0])
-ss, –shutter : Set shutter speed in microseconds
-awbg, –awbgains : Set AWB gains – AWB mode must be off
-drc, –drc : Set DRC Level
Notes
Exposure mode options :
auto,night,nightpreview,backlight,spotlight,sports,snow,beach,verylong,fixedfps,antishake,fireworks
AWB mode options :
off,auto,sun,cloud,shade,tungsten,fluorescent,incandescent,flash,horizon
Image Effect mode options :
none,negative,solarise,sketch,denoise,emboss,oilpaint,hatch,gpen,pastel,watercolour,film,blur,saturation,colourswap,washedout,posterise,colourpoint,colourbalance,cartoon
Metering Mode options :
average,spot,backlit,matrix
Dynamic Range Compression (DRC) options :
off,low,med,high
Preview parameter commands
-gs, –glscene : GL scene square,teapot,mirror,yuv,sobel
-gw, –glwin : GL window settings <’x,y,w,h’>
[/code]
[code]
pi@raspberrypi ~ $ raspivid
raspivid Camera App v1.3.12
Display camera output to display, and optionally saves an H264 capture at requested bitrate
usage: raspivid [options]
Image parameter commands
-?, –help : This help information
-w, –width : Set image width <size>. Default 1920
-h, –height : Set image height <size>. Default 1080
-b, –bitrate : Set bitrate. Use bits per second (e.g. 10MBits/s would be -b 10000000)
-o, –output : Output filename <filename> (to write to stdout, use ‘-o -‘)
-v, –verbose : Output verbose information during run
-t, –timeout : Time (in ms) to capture for. If not specified, set to 5s. Zero to disable
-d, –demo : Run a demo mode (cycle through range of camera options, no capture)
-fps, –framerate : Specify the frames per second to record
-e, –penc : Display preview image *after* encoding (shows compression artifacts)
-g, –intra : Specify the intra refresh period (key frame rate/GoP size)
-pf, –profile : Specify H264 profile to use for encoding
-td, –timed : Cycle between capture and pause. -cycle on,off where on is record time and off is pause time in ms
-s, –signal : Cycle between capture and pause on Signal
-k, –keypress : Cycle between capture and pause on ENTER
-i, –initial : Initial state. Use ‘record’ or ‘pause’. Default ‘record’
-qp, –qp : Quantisation parameter. Use approximately 10-40. Default 0 (off)
-ih, –inline : Insert inline headers (SPS, PPS) to stream
-sg, –segment : Segment output file in to multiple files at specified interval <ms>
-wr, –wrap : In segment mode, wrap any numbered filename back to 1 when reach number
-sn, –start : In segment mode, start with specified segment number
-sp, –split : In wait mode, create new output file for each start event
-c, –circular : Run encoded data through circular buffer until triggered then save
-x, –vectors : Output filename <filename> for inline motion vectors
-cs, –camselect : Select camera <number>. Default 0
H264 Profile options :
baseline,main,high
Preview parameter commands
-p, –preview : Preview window settings <’x,y,w,h’>
-f, –fullscreen : Fullscreen preview mode
-op, –opacity : Preview window opacity (0-255)
-n, –nopreview : Do not display a preview window
Image parameter commands
-sh, –sharpness : Set image sharpness (-100 to 100)
-co, –contrast : Set image contrast (-100 to 100)
-br, –brightness : Set image brightness (0 to 100)
-sa, –saturation : Set image saturation (-100 to 100)
-ISO, –ISO : Set capture ISO
-vs, –vstab : Turn on video stabilisation
-ev, –ev : Set EV compensation
-ex, –exposure : Set exposure mode (see Notes)
-awb, –awb : Set AWB mode (see Notes)
-ifx, –imxfx : Set image effect (see Notes)
-cfx, –colfx : Set colour effect (U:V)
-mm, –metering : Set metering mode (see Notes)
-rot, –rotation : Set image rotation (0-359)
-hf, –hflip : Set horizontal flip
-vf, –vflip : Set vertical flip
-roi, –roi : Set region of interest (x,y,w,d as normalised coordinates [0.0-1.0])
-ss, –shutter : Set shutter speed in microseconds
-awbg, –awbgains : Set AWB gains – AWB mode must be off
-drc, –drc : Set DRC Level
Notes
Exposure mode options :
auto,night,nightpreview,backlight,spotlight,sports,snow,beach,verylong,fixedfps,antishake,fireworks
AWB mode options :
off,auto,sun,cloud,shade,tungsten,fluorescent,incandescent,flash,horizon
Image Effect mode options :
none,negative,solarise,sketch,denoise,emboss,oilpaint,hatch,gpen,pastel,watercolour,film,blur,saturation,colourswap,washedout,posterise,colourpoint,colourbalance,cartoon
Metering Mode options :
average,spot,backlit,matrix
Dynamic Range Compression (DRC) options :
off,low,med,high
[/code]